This week last year I took photos and video of friends on the River Swale, North Yorkshire.
This week I paddled the River Swale and had friends video me for once!
On Tuesday of this week I joined four other friends all from UCLAN university and had a day of anxiousness, adrenaline, waterfalls, success and vocal celebrations. The feeling of accomplishment I felt that day, I have not felt in a long time and I had a permanent smile for the rest of the day. The waterfalls we were going over ranged from roughly 8ft to 15ft and were graded IV and V.
The rapid/river grading system in whitewater kayaking is based on skill required to negotiate the rapid, the hazards of a rapid and risk and outcomes of the rapids. The scale goes from I-VI. At the top of the scale, grade VI, a rapid that is grade VI is seen as not passable or if so only in very specific conditions. Upon this if you get the line wrong on the rapid or mess up your going to end up either dead or severely injured in hospital. A description of all the grades can be found here on UK river guidebook.
Hopefully in the future I can post a link to the video my friends took.
To show what we were paddling you can watch some videos of my firends from last year on my youtube channel. Click the link below.
http://www.youtube.com/user/WhitewaterAptitude

Wednesday 30 January 2013
Wednesday 16 January 2013
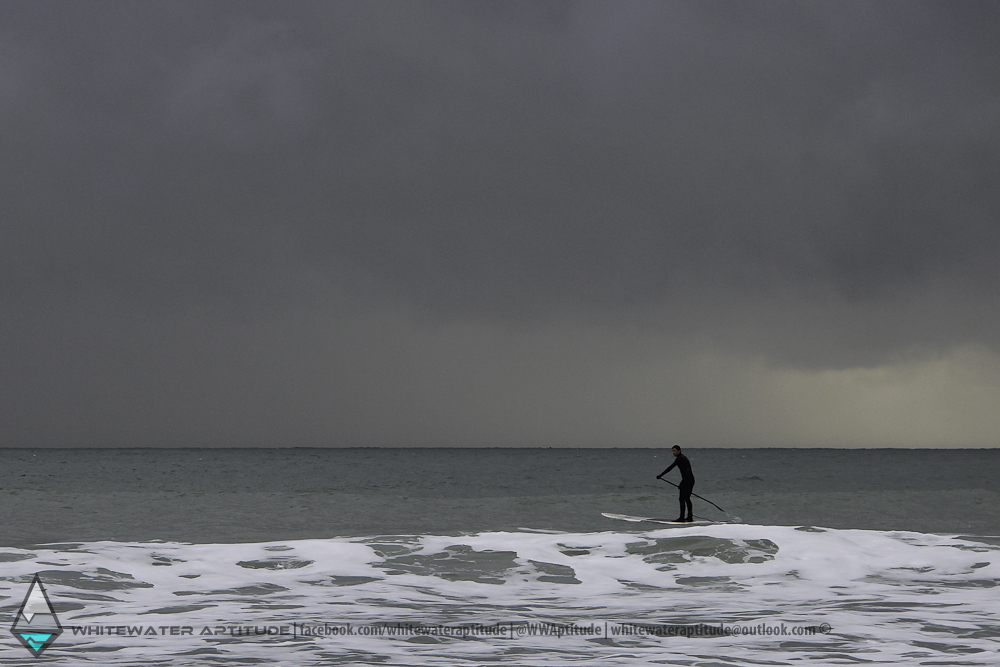
SUP
The past two weeks I have been getting out surf kayaking with on the sea at Bournemouth beach. I've been going with my friends Peza and Cheryl who have both been showing me up on Stand Up Paddle-boards (SUPs). We've been out a number of times over and the waves have gadually became better and more surfable until the last Saturday when the waves grew to a whopping continuous 4ft high the with the odd wave rolling in around 5-6ft. For my ability, at times, this was terrifying. To surf the waves firstly you needed to get "out back". The outback in surfing is the area where you wait for the waves to come in, spot them, then ride them. To get out back I needed to time my paddling correctly so to not get caught up in the large aftermath of breaking waves and also not be at the same point where the waves were breaking. Unlike a surfer, in my kayak, I cannot dip underneath the breaking waves, i have to punch through them, a downfall to surf kayaking. However I managed to predict my paddling fairly well and get outback always relieved.
From here I was able to get in position to surf the waves coming in as best I could. after surfing the green wave then also surfing the strong broken wave. I would often end up all the way back on the beach and have to repeat the process of getting out back, a tiring action.
I unfortunately had one swim on this day after getting caught out by a huge steep wave as I was getting out back. I ended up trying to go over the it at the time it was steepest. Unfortunately due to the steepness of the wave and gravity instead of punching through the top of the wave. I felt my boat sliding back down the wave face and start to plain. So i started surfing the wave backwards. Something I can just about do on a small wave. This six footer was no match for me. I was unable to spin back around to face down the wave and ended up going over. I tucked up and felt as the wave broke and carried me all the way to the beach still upside down. I tried performing my C to C roll but in the foamy wash I couldn't managing. I chose to come out of my boat. I then had to get myself boat and paddle to shore only 15m away the dumping waves made it a struggle. I emptied my boat of water and carried on as I had been doing before.

 At the beginning of our session the tide was in and I was keen to get on the water. However I didn't put on my new GoPro mount as I didn't want to have it trashed straight away which it would have done. As the tide dropped towards the end of my session the waves became unsurfable for me, so I got my DSLR out and snapped some photos of Peza on the diminishing leftovers from stood in the shallows.
We use the site MagicSeaweed to predict what the surf conditions are going to be like.
After these exciting times in the next few days I then had an equally exciting time doing my first piece of commercial/non commercial work for an old friend Sam of Cumulus Outdoors. I was creating a promotional video for them to promote their coasteering programs based along the Souths Jurassic Coastline. The experience was extremely beneficial. Learning what skills I need to further develop and how to approach future work projects.
From here I was able to get in position to surf the waves coming in as best I could. after surfing the green wave then also surfing the strong broken wave. I would often end up all the way back on the beach and have to repeat the process of getting out back, a tiring action.
I unfortunately had one swim on this day after getting caught out by a huge steep wave as I was getting out back. I ended up trying to go over the it at the time it was steepest. Unfortunately due to the steepness of the wave and gravity instead of punching through the top of the wave. I felt my boat sliding back down the wave face and start to plain. So i started surfing the wave backwards. Something I can just about do on a small wave. This six footer was no match for me. I was unable to spin back around to face down the wave and ended up going over. I tucked up and felt as the wave broke and carried me all the way to the beach still upside down. I tried performing my C to C roll but in the foamy wash I couldn't managing. I chose to come out of my boat. I then had to get myself boat and paddle to shore only 15m away the dumping waves made it a struggle. I emptied my boat of water and carried on as I had been doing before.

We use the site MagicSeaweed to predict what the surf conditions are going to be like.
After these exciting times in the next few days I then had an equally exciting time doing my first piece of commercial/non commercial work for an old friend Sam of Cumulus Outdoors. I was creating a promotional video for them to promote their coasteering programs based along the Souths Jurassic Coastline. The experience was extremely beneficial. Learning what skills I need to further develop and how to approach future work projects.
Wednesday 9 January 2013
GoPro Mount
 I've been researching to make a pole style GoPro mount for my kayak
for some time and being home has given me the access needed to tools and
odd nuts, bolts and washers I needed to complete the creation. There are
a number of options for creating something similar I got this design
idea off the kayak tips, tricks and reviews site Unsponsored.
I've been researching to make a pole style GoPro mount for my kayak
for some time and being home has given me the access needed to tools and
odd nuts, bolts and washers I needed to complete the creation. There are
a number of options for creating something similar I got this design
idea off the kayak tips, tricks and reviews site Unsponsored. Firstly I acquired all the pieces I would need for the design and tools.
1x Cut down piece of steel
2x Bolts from original Fluid grab handle
1x Bolt and fitting Nut
1x Large Washer
2x 32mm End Cap Plug
1x Cut down piece of PVC pipe (not sure what diameter this was it was scrap i found in my garage). (55cm Long)
1x GoPro flat mount
1x Length of strong cord
1x Electric Drill
1x Metal Saw
1x Adjustable Spanner
1x Flathead Screw Driver
1x Allen Key set
Piping Glue
I removed the original rear grab handle from my Fluid Detox by unscrewing it and then used the original handle as a template for the new one. I cut the odd piece of steel to the correct length then drilled two holes for the handle to be re attached then a third hole in the center of the handle. Thats that piece complete.
Now to complete the rest of the "base". Firstly drill a hole in ONE end cap. You should then be able to use the 1x Bolt and Nut and 1x Large Washer to construct it. I took into account I'm not always going to be using the GoPro mount and therefore have tried to keep the handle and base as snag free as possible so it can still be grabbed by someone in a rescue situation or possibly be used to clip the boat if it needs rescuing (hopefully will never happen!). To keep it snag free I shortened the Bolt I was using so to not stick out above the End Cap.


Monday 7 January 2013
Hart Ride the Storm >> Whitewater Aptitude
If you were a keen follower of my Hart Ride the Storm blog sorry for no notice of changing my name and blog web address. The name change has occurred across all my social platforms including.
*As a result of the name change many links to HARTrts content may be broken.*
*As a result of the name change many links to HARTrts content may be broken.*
- This Blog: http://whitewateraptitude.blogspot.co.uk/
- Facebook: http://www.facebook.com/whitewateraptitude
- Twitter: https://twitter.com/WWAptitude
- Youtube: http://www.youtube.com/user/WhitewaterAptitude
- Vimeo: https://vimeo.com/wwaptitude
Friday 4 January 2013
Canford Weir
First post of 2013 Happy New Year
I've spent the past festive weeks at my home in Dorset getting out boating as much as possible on the local weir at Canford Magna or out on the sea.
The weir at Canford is on the River Stour. This location needs a lot of water and the river level rises to a state of high or flood Canford weir turns into a reasonable sized wave and stoppers. Jack and Josh, the paddlers I was boating with, both managed to have a good play on the weir however for myself it was a little intimidating looking very similar to the area where I broke my nose up in Cumbria. The anxiousness that kept coming over me as I was just getting onto the wave would then lead to me coming off the back so my efforts were always disheartening and frustrating. However we moved over to a different area where my efforts were rewarded. Level with the weir on river right there is a sluice gate that on this day was producing a long boxed in surf-able wave. At first from the water you couldn't quite see the whole size of the wave or its origin, putting me off even dipping my nose in this one. However we needed to do some gardening to to make it easier to get onto the wave. This gave me the oppotunity to see the wave fully and after I had removed the foliage that was obscuring our play area I jumped back in my boat and had an awesome number of blasts on it. The wave was very fast and I struggled to flatten my boat out to surf it straight therefore I kept zipping back and forth across the face of the wave which was a great success for myself. I recon I might have been leaning back to much which casued this. Next time I aim to slow it down a bit and stay on longer. Hoping to see Josh's footage from the session to take some personal points to work on.
Subscribe to:
Posts (Atom)